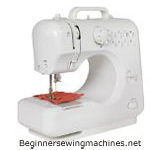
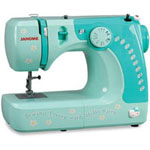
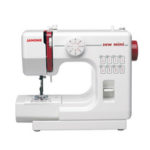
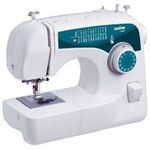
 A sewing machine is a precision instrument and requires a lot of care. The instruction manual that came with your machine should show you how to maintain it and keep it in working order, how to make simple adjustments, and how to operate it. If you do not have a manual, you can order one through the manufacturer. The manual helps to identify certain parts mentioned from time to time in sewing directions, such as the threader, cutter, tension, and various feet that can be used.
How to Use a Sewing Machine
Following are some basics to learn about your sewing machine.
Make sure you place the sewing machine on a sturdy table or cabinet. Use a nice comfy chair because you’ll be sitting for long periods of time. You’ll be amazed at how fast time flies when you’re sewing.
Leave the machine unplugged for now. First, you will have to insert the machine needle. There is a post with a hole where the needle is inserted. The needle can only go in one way. There is a flat side, which is usually faced toward the back. There is a small thumbscrew that tightens against the needle to hold it in. Loosen it enough for the needle to slide in. Keeping the needle straight up and down, place the flat side up through the hole until it stops. Then tighten the thumbscrew.
Next, there should already be a standard presser foot attached. If not, you will need to attach the presser foot (the standard presser foot looks like skis). It either snaps on or slides into place and is tightened with the thumbscrew. Most machines come with a few presser feet. The standard one is for straight and zig-zag sewing.
Then, you have to learn how to wind the bobbin and thread your machine. You want to wind the bobbin before threading the machine. This means that you have to transfer some of the thread from the spool to the bobbin. Follow the manual’s instructions. Next, thread the machine. Some machines have a guide printed on the machine to show you how to thread it.
Some machines use a drop-in bobbin. Others have a bobbin case that holds the bobbin and is inserted vertically. After the bobbin is in place, hold the upper thread in your left hand and turn the wheel with your right hand. Turn it slowly toward you one full turn. Using a pencil or scissors, pass it between the presser foot and the plate to pull up the thread. You should now have both top and bottom threads. Pull them back and out of the way.
If you are a beginner, operate it slowly enough to allow you to follow the marking lines exactly. In a short while you will find that you can sew at a much faster pace. Keep in mind that accuracy, not speed, is much more important.
Stitch length, pressure and tension are the three variables that must be adjusted to the specific fabric you are going to use. Refer to the manual for the correct needle size and stitch length. The manual also shows you how to adjust the pressure and tension of your machine.
Basic Stitch Lengths most generally used are:
Regulation Stitch – from 12 to 16 stitches per inch, depending on fabric weight. Use the shorter stitch lengths for fine and lightweight fabrics.
Machine-Baste – the longest stitch on your machine. This stitch is used as a temporary stitching, which can be removed easily by cutting the knot and pulling the thread out.
Ease Stitch – about 10 stitches per inch. This stitch is used for easing in fullness evenly.
Reinforcement Stitch – about 20 stitches per inch. This stitch is used for strengthening the stitching line at points of strain.
Pressure adjusted correctly on the presser foot holds the fabric firmly while the machine is stitching. The regulation of the pressure depends on various characteristics of the fabric, such as thickness or weight, texture or finish.
Tension on the thread, properly adjusted, results in a balanced stitch exactly the same on both sides of the fabric. Improper tension can cause puckering or loose stitches. Once it is set properly, tension usually needs no further adjusting.
Once you have learned to handle your machine with the ease of an expert, you may try more complicated sewing techniques, or try some innovations of your own. However, a beginner should confine themself to the more simple basic methods.
Be sure to thread the machine correctly or breakage may occur. Your manual contains a diagram for correct threading of your machine. Cut the thread at an angle to enable it to go through the eye of the needle more easily.
Testing a Seam for Tension and Pressure
From scraps of fabric you are using, cut two strips about eight inches long on the lengthwise grain. Match the lengthwise edges and pin together at each end with the pins at right angles to the lengthwise edge. Place the double layer of fabric under the presser foot, and start stitching while guiding the fabric in front of the presser foot. If fabric does not feed smoothly, but feeds in a jerky manner, pressure on the presser foot is too light. If ripples, pressure on the presser foot is too heavy. If fabric puckers, the thread tension is too tight on both the needle and the bobbin. If stitching is out-of-balance, thread tension is either too loose on one side or too tight on the other side. Make any necessary adjustments and test the seam again.
Check out the following series on Sewing for Beginners, which also includes Video How-To’s:
How To Sew For Beginners, Part 1 through 11
Sewing Machine Manuals
Janome
Kenmore
Singer
Happy Sewing!
Related Posts
Latest posts by Susan (see all)
- My Favorite 2016 Holiday Fabric Prints - October 24, 2016
- Janome Sew Mini in Three New Colors – Beachcomber, Honeycomb & Merlot - February 3, 2016
- Janome 14412 Pink Hello Kitty Sewing Machine - April 4, 2015


