 The presser foot (some call it a pressure foot) is attached to the lever that is used to hold the material in place as the fabric is fed through the machine. It also has a spring hinge that allows some flexibility when sewing over thicker areas.
The sewer guides the fabric with one hand so that it stays straight and lines up with the seam allowance marker.

Underneath the fabric is the feed dog, which has tiny teeth and provides the traction to move the fabric forward. The feed dog can be dropped on most machines when you need to do free-motion sewing. 
Most sewing machines built since the 1980s use snap-on presser feet, rather than the kind that screws on to the shank that holds the presser foot. Except for Bernina sewing machines, which would need an adapter.

There are also three different types of shanks; low shank, high shank, and slant shank. Presser feet are designed for only one shank type and cannot be used on sewing machines with a different shank type, unless a shank adapter (converter) is used. For example, with an adapter a high shank can be converted to a low shank in order to use a low shank presser foot. Snap-on adapters for low, high and slant shank models are also sold by many vendors and sewing machine stores.
The slant shank is used mostly by Singer sewing machines. Some Singer machines use special machine needles that cannot be used on other brands of machines. There are many different types of sewing machine needles, each for different types of fabric and thicknesses. Refer to the needle chart on our post, Sewing Accessories & Supplies.
Most Brother sewing machines have a low shank and use standard snap-on presser feet, and size 15 machine needles. Embroidery machines use special presser feet and needles. Brother Presser Feet (Low Shank) – Click Here!
To determine the type of shank needed for your machine, low shank or high shank, measure the distance from the screw-hole that holds the presser foot to the plate at the bottom of the presser foot.
A high shank measures about 1-1/4″ from the bottom of the presser foot to the screw hole.
A low shank measures about 3/4″ from the bottom of the presser foot to the screw hole.

When in doubt, check with the manufacturer’s manual for the proper presser feet, bobbins and needles for your machine.
Most sewing machines come with a standard all-purpose presser foot, also known as a zig-zag foot. Other  basic presser feet might include a blind stitch foot, buttonhole foot, and zipper foot. For extra thicknesses, a walking foot would replace the presser foot, and a quilting foot would be used for quilting. When pricing a sewing machine, take into consideration the accessories that come with it because purchasing them separately could be more costly.
LASTLY, BE SURE TO TEST SEW ANY NEW ACCESSORY BY HAND-TURNING THE WHEEL BEFORE USING THE MACHINE AT FULL SPEED TO ENSURE THAT THE NEEDLE CLEARS ALL PARTS OF THE ACCESSORY. FAILURE TO TEST SEW CAN RESULT IN DAMAGE TO THE MACHINE AND POSSIBLE INJURY.
What Presser Foot Should I Use?
Following is a list of presser feet and their uses. Most of the image links shown are for low shank Brother machines:
 1/4-inch Quilting Foot – Used to keep an even 1/4″ seam, essential for piecing quilts. It is important that 1/4″ seams are accurate so that the quilt pieces fit together evenly. The guide lines on the throat plate aren’t always accurate, and even with this foot it is still a good idea to test your seam allowance for accuracy. Some machines allow you to move the needle to the right or left to achieve that perfect 1/4″ seam allowance. Using graph paper and painter’s tape, you can create your own guide. You can also purchase the Machine Seam Gauge & Adhesive Guide at Amazon.
 Appliqué Foot – Used to sew on appliqué pieces. This is a very convenient foot when doing applique, embroidery, cutwork and monogramming. It allows you to see through the clear plastic foot for precise sewing.
 Binding Foot – Used to create bias binding from raw bias strips. Just squeeze the folded bias into the binding foot, which holds it in place while attaching it to the edge of the fabric. See How to use a Machine Binding Foot on YouTube.
 Blind Hem Foot – Used to create professional-looking blind hems on skirts and pants.
 Braiding Foot – Used for perfect placement of braiding, cording, ribbon, or elastic. Simply adjust the guide on the foot to fit your cord, ribbon, braiding or tape and the sewing foot will automatically center it while your machine sews it in place.
 Button Sewing Foot – Used to sew on buttons. The button-sewing foot holds buttons, snaps and eyes in place while sewing.
 Buttonhole Foot – Used to create buttonholes. There are different types of buttonhole feet, and the one you need is going to depend on the type of sewing machine you have. If your machine comes with a one-step buttonhole, then you would need the automatic buttonhole foot. If your machine comes with a four-step buttonhole, then you would need the four-step buttonhole foot. Contact the manufacturer or refer to your manual to see which type you need.
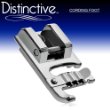 Cording Foot – Used to sew on cording, piping, or thread. The cording foot has a notch that allows a cord, piping or a thick seam to pass under the foot as you sew and keeps the stitching straight as you pass over the cording. This is great for home decorating projects, such as napkins, pillows, placemats, and heirloom sewing.
 Darning Foot – Also called quilting foot, free motion quilting foot, or free motion foot. This spring action foot has a large hole and metal, making it heavy-duty and perfect for free motion embroidery, darning or quilting.
 Edge Joining Foot/Stitch in the Ditch Quilting Foot – Used for stitching in the ditch. The stitch in the ditch presser foot is perfect for joining the edges of two fabrics as you butt two edges together precisely and effectively. The Edge Joining Foot holds the fabric in place as you sew while leaving a large opening so you can join fabrics together with decorative stitches as well as the standard straight stitch. Placing the blade in an existing seam allows the user to follow a seam and sew virtually invisibly through multiple layers of fabric because the new straight stitch seam becomes hidden in the existing stitch seam. It is also useful when top-stitching to do perfect edge stitching.
Elastic Guide Foot – Used for sewing elastic.
Even Feed Foot (See Walking Foot below) – Used to feed multiple layers or slippery fabric evenly  while sewing.
Felling Foot – This foot has a 4mm underfoot groove which is great  for making one-step, flat felled seams and for turning narrow edges and hems. The Flat Fell foot is used to turn fabric over so you can stitch it precisely, similar to the encased side seams on jeans. This foot also works great for quilt binding
 Fringe/Looping Foot – Used to attach fringe to garments and home décor projects. See how to use a Fringe Foot on YouTube.
Gathering Foot – Used to create gathers on fabric. Note that this is  similar but different than a ruffler. Tip: The trick to using the gathering foot is selecting the correct stitch length and tension. The longer the stitch length and the higher the tension, the more gathering you will get. Note that it could take six times as much fabric. For example, six inches of fabric create a one-inch gathered piece of fabric. See How to use a Gathering Foot on YouTube.com.
Hemmer Foot – Used to create hems.
 Narrow Hem Foot – Fold and stitch fabric edges in one step. With practice, you will be able to sew narrow hems with this presser foot. The Narrow Hem foot is slightly wider and flatter to form and create a beautiful narrow hem. See Sewing with a Narrow Hemming Foot on YouTube.com.
 Invisible Zipper Foot – Used to install a concealed zipper, mostly in clothing. The parallel grooves on the bottom of the foot holds the zipper in place as you sew, hiding the actual zipper teeth.
Left Edge Top Stitch Foot – Used to create a topstitch when there is a hem or binding to the right of the foot.
Non-Stick Glide Foot – Used for sewing foam, plastic, coated fabrics, leather, and imitation leather. Also known as Teflon™ Foot or Ultraglide Foot.
Open Toe Foot – The open toe foot is used for small precision stitching that is used for applying lace or appliques to a craft project.
Overedge Foot – Used with an overcast stitch to allow thread to wrap around the edge of the fabric to prevent unraveling. Also referred to as a serger stitch).
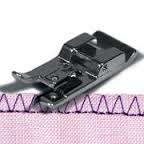 Overlock Foot – Used for sewing overcast seams. Also called a serging stitch, this presser foot sews professional looking seams with an overcast stitch on the edge. See how to use the Overlock Foot on YouTube.
Picot Foot – Used to sew special edges like frills.
 7mm Pin Tuck Foot – Sew perfectly parallel seams with our grooved pintuck foot. Requires a double needle. Tip: You may need to experiment to get the correct stitch length and tension. Customized bobbin case covers for feeding cording into pin tuck as it is being formed and measurement. See How to use Pintuck Foot on YouTube.com.
Piping foot – Used to sew in piping.
Rolled Hem Foot – Used to create a rolled hem.
Roller Foot – Used to sew materials that are difficult to feed.
Rotary Even Foot – Used to prevent hard to feed fabrics from puckering while sewing.
Ruffler Foot – Used to create ruffles.
Rug-Making Fork – Used to make customized trim and fringe.
Satin Stitch Foot – Used for decorative sewing.
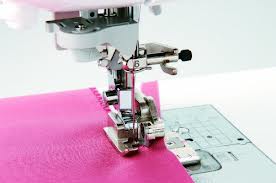 Side Cutter – Turn your machine into a serger with this attachment. It is used to overcast seams and cut the excess fabric at the same time. See How to use a Side Cutter on YouTube.com.
Straight Stitch Foot – Used for seaming, quilt piecing, and top stitching.
Teflon™ Foot – Used for sewing foam, plastic, coated fabrics, leather, and imitation leather.
Tricot Foot – Used to evenly feed lightweight fabrics.
Ultraglide Foot – Used to sew fabrics that may stick to a metal foot, such as ultra suede, faux leather, and plastic.
Utility Foot – Used for utility stitches.
Walking Foot (also called an Even Feed Foot) – Used when sewing thick projects, such as quilts.  For example, when sewing multiple layers of fabric the feed dog may not be enough to move all of the layers of fabric evenly with its little teeth. The walking foot replaces a standard presser foot and presses down on the fabric while it “walks” the top layers of fabric along with the bottom layers of fabric with its own set of teeth.
 Zigzag Foot – Also called a general or all-purpose foot because it allows for most types of stitches.
 Zipper Foot – Used to insert zippers.
 Adjustable Zipper/Piping Foot – Used for piping and inserting zippers. This is probably the only foot you will need for piping, zippers and invisible zippers. It is more narrow than a regular zipper foot.
Learn more about these presser feet and how to use them. The Sewing Machine Accessory Bible will show you how to use them and how to do some really interesting sewing techniques.
Related Posts
Latest posts by Susan (see all)
- My Favorite 2016 Holiday Fabric Prints - October 24, 2016
- Janome Sew Mini in Three New Colors – Beachcomber, Honeycomb & Merlot - February 3, 2016
- Janome 14412 Pink Hello Kitty Sewing Machine - April 4, 2015



[…] Glossary of Presser Feet […]